The Plot Thickens
- Plotter can be purchased here.
- Assembly PDF (intended for a different model, but close)
- Software (scroll to bottom)
A few weeks ago I came across this post and then fell down the beautiful rabbit-hole that is #plottertwitter. Apparently plotters are now having a moment, and this is super cool, but I have to confess something: I don't really care about generative work. Like... at all.
I do really love to see what other people make, but my interest in plotters comes from book arts, zine and printmaking. I used to do letterpress and screen printing. I'm into papercraft. I really want a printmaking studio again. More than anything I want a giant, loud, annoying-to-supply and maintain Risograph machine. But I live in a tiny apartment in a tiny country where importing things is difficult and expensive. So this under-100 dollar line-making machine seemed super interesting.
Incidentally I don't mean to set any of this up in opposition to "team generative." Nobody gets to own computation or art, and we are on the same track, we are just staring at the problem from different ends. I do think I have one small advantage though: as someone who is primarily focused on the materiality of the process, I don't care much how accurate or precise my CNC machine is, as long as I can get an interesting output. In fact, I really enjoy glitchy, leaky, hacky, falling-apart tech specifically for its quirks.
Enter "the cheap plotter..."

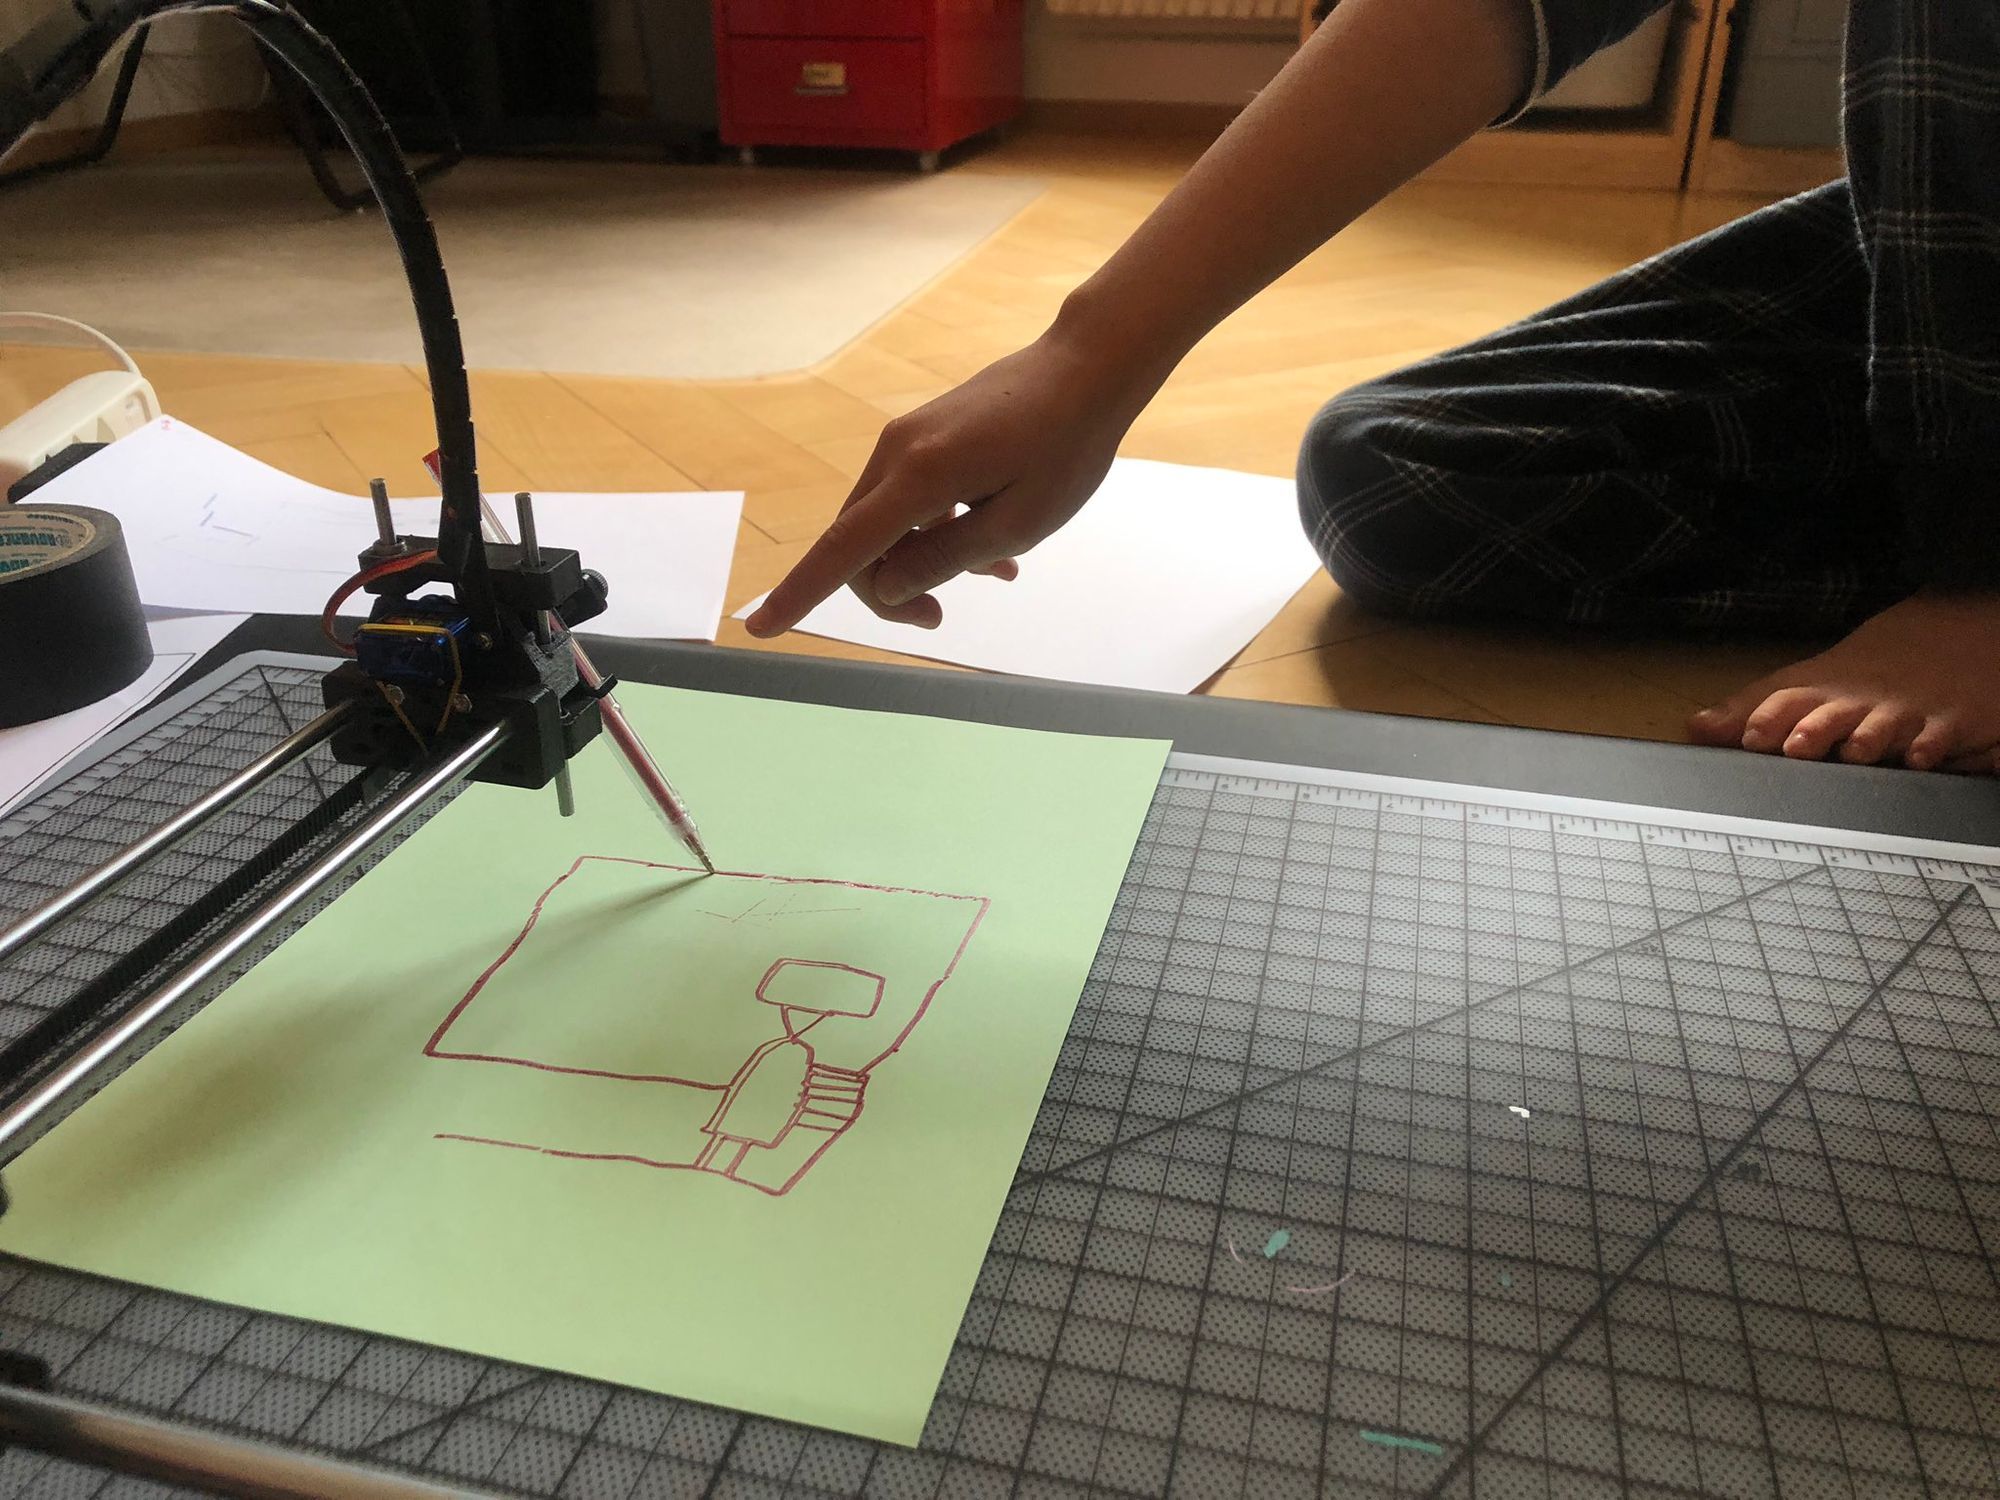
The Cheap Plotter
Cheap as opposed to the Axidraw, which is a beautiful machine and likely what I would buy if I did care about precision, accuracy and generative work. The Axidraw would also be my choice if I was teaching a class, buying this for a business or in any way in need of reliability. In fact we'll see how it goes but if I end up deep in plotterland I may end up buying one anyway.
For now, I ordered this machine on AliExpress. I placed the order on March 24th and paid $74.69 shipped. It arrived yesterday (April 8th, 2021). I suspect this is not exactly the same machine as featured in this blog post, but it's very similar. So similar, in fact, that the assembly document provided to me is the same one Paslier received. However, in true AliExpress fashion, the parts in my kit were quite different from the assembly manual (more on that in a minute).
Is it Any Good?
Yes! Provided you are ok with hand assembly and enjoy projects, and are ok with a setup that will draw but not give you a ton of control. Beware also if you are expecting a peripheral, like a printer, this will NOT appear as a printing device on your computer, you will need to jump through a few hoops to get it to draw. If you want a simpler experience (and I don't blame you), better to just buy something with a full featured controller.
That said, this was a fairly fun weekend project and it works far better than it should for the price. I found the engineering delightfully clever - I particularly like the use of zip-ties as cable-run and tensioners. The gearing is pretty neat too, it's not that rare, but quite fun to see exactly how to assemble a two-motor mechanism that can travel in X/Y.
The two primary motors seem solid enough and are reasonably quiet. For parts-sleuths, they are labeled: "DXIMTECH SL42STH34-1334A. No. 20210310133."
The motor which operates the pen up/down mechanism is labeled "Tower Pro micro serv0 9g." This looks like a standard model aircraft servo in design. It seems quite cheaply made but it seems easy to source a replacement (and they included a backup).
The controller is a clone of an Arduino UNO with a clone of a CNC shield. These work perfectly, but the microcontroller does use a different USB chip than the standard Arduino and so requires different drivers (scroll down to "Running the Plotter" below for a link).
How durable is this setup long term? Will it lose precision and start slopping all over the place? I have no idea, we'll see I guess.
The one part I do expect will wear out the soonest is the "tensioning device" which spring-loads the pen against the paper. This is: a rubber band! The kit comes with a few extras, and fortunately rubber bands aren't that hard to come by. I do fully anticipate it will just snap mid-plot at some point though. A note on this: I may have just been tired at the end of the build but I could not figure out how this was "supposed" to work. I ended up wrapping it around the motor housing as shown and it... works fine? Let me know if you have one and there's a better way.

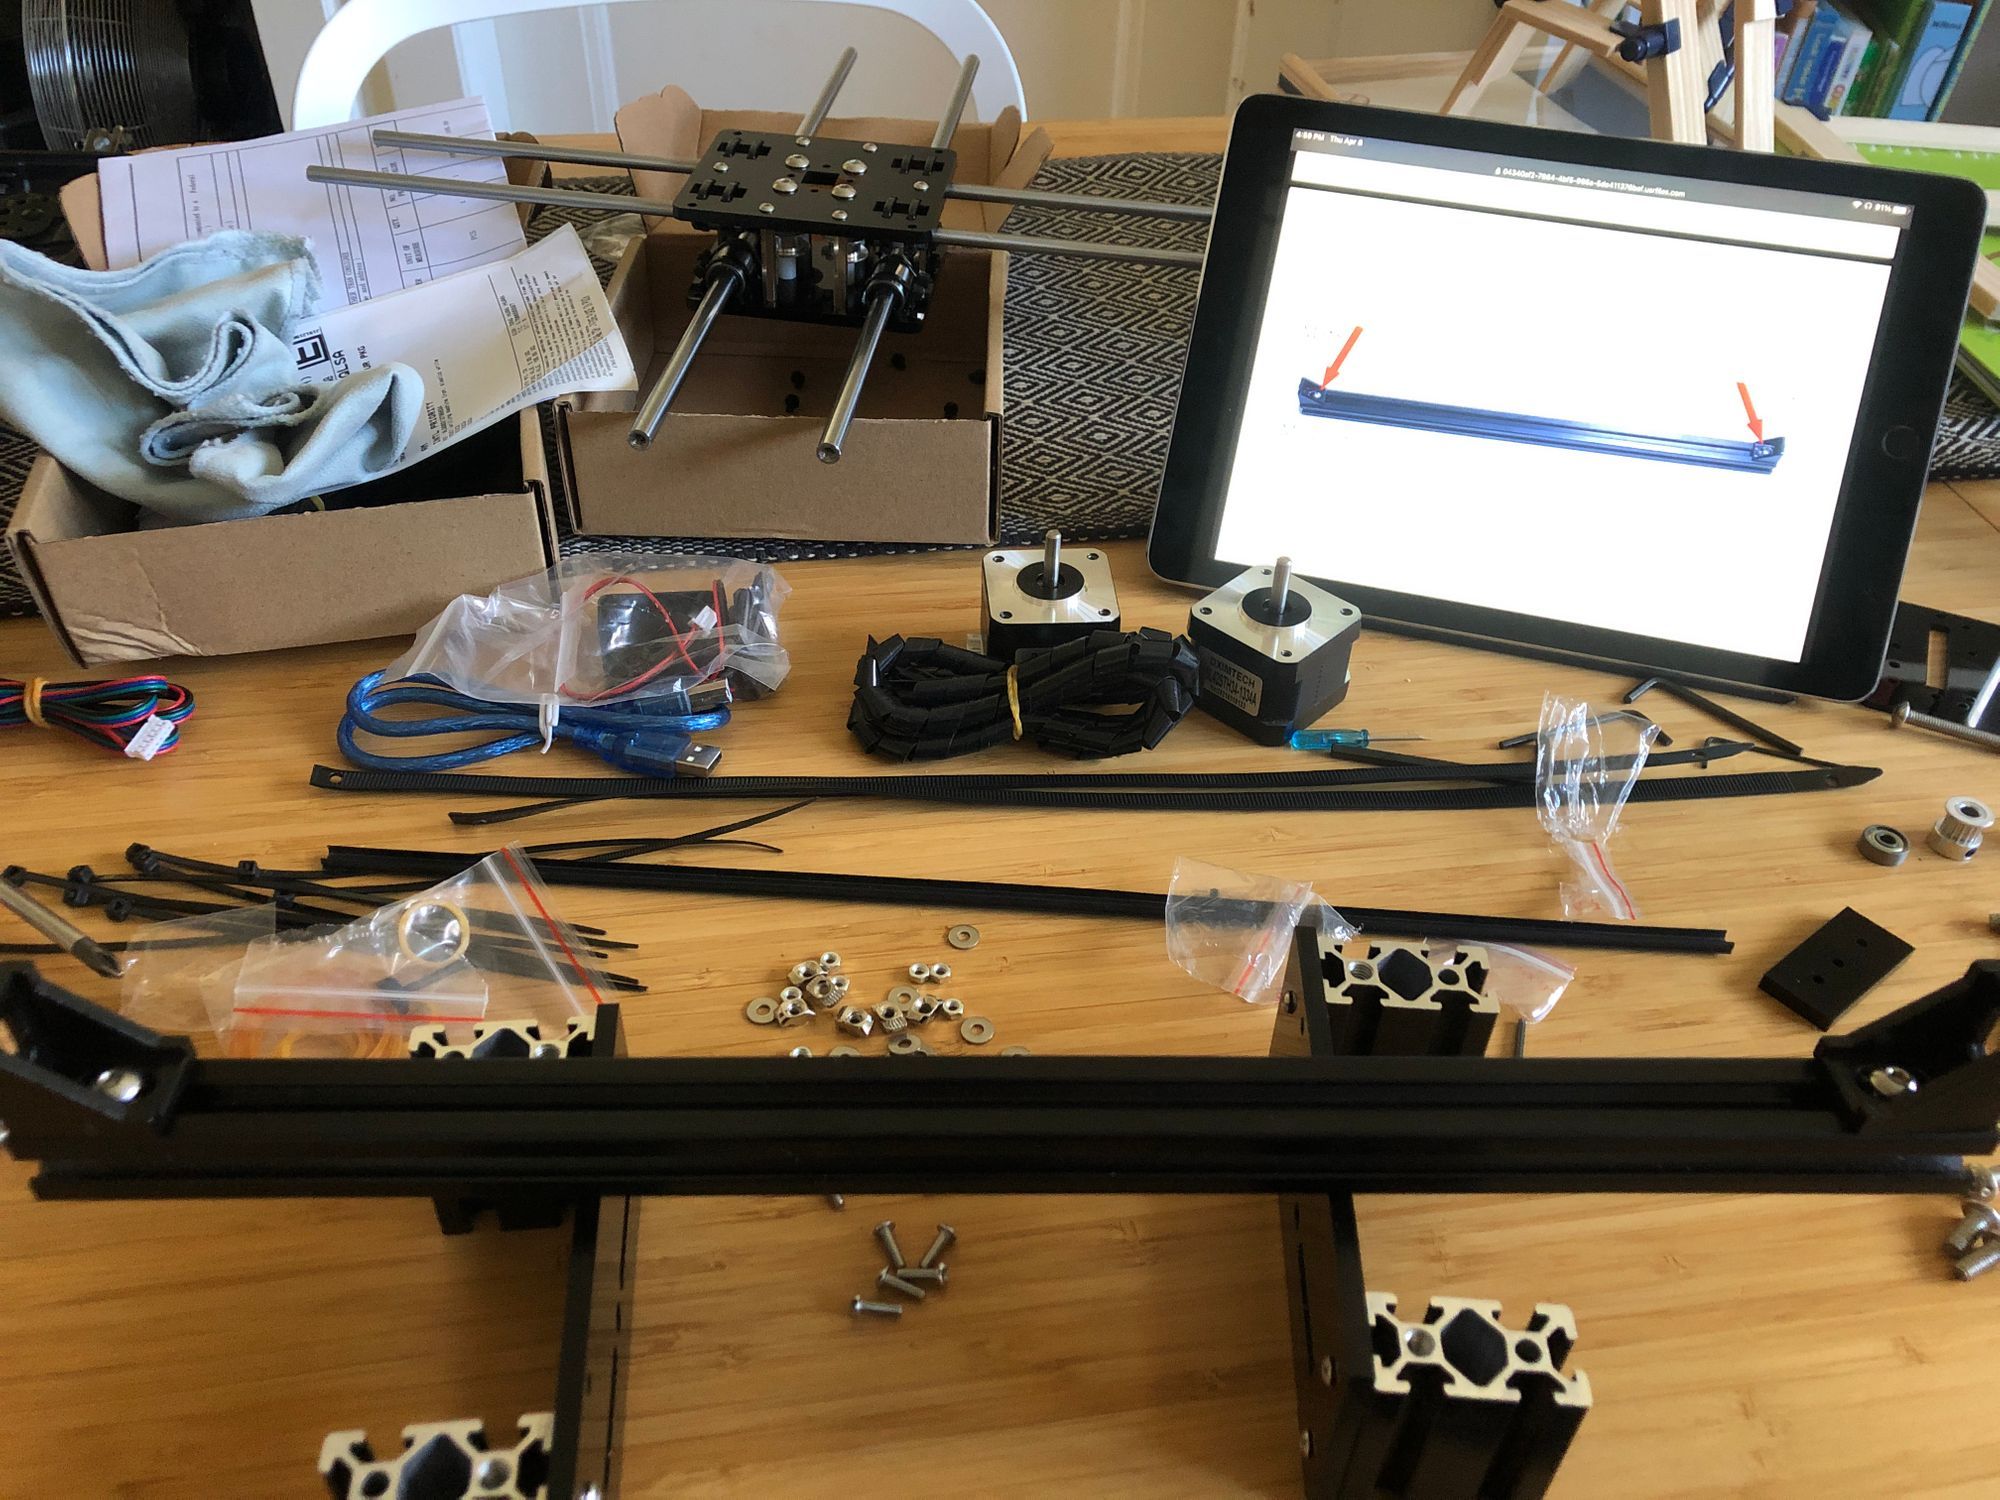
Things You Should Know: Assembly
- You will get a box of parts and some small tools (IKEA-style). That's it. You can (and should) request the seller provide you with assembly instructions and software. You will receive this PDF and some software. The assembly instructions actually describe a different design - it's close enough that you should be able to follow, but be aware you're probably going to need to puzzle a few things out. The software they sent was also not that useful, mostly old copies of the software I link below (so better to download the latest right from the source). They did include some sample GCODE which was nice for testing.
- Assembly took me about 5 hours total. I didn't rush but I also worked steadily. I don't feel like it required any more attention than assembling a complex Lego kit, but YMMV.
- Each bag of parts is labeled, in tiny handwritten pen, in the corner of the bags. It's my fault for not noticing this sooner, but it would have made assembly mildly easier if I hadn't just ripped open most of the bags and dumped the parts into a bowl.
- The included USB cable (a standard A-B) was extraordinarily short. Do yourself a favor and get a longer one.


Things You Should Know: Running the Plotter
I knew from the internet that this plotter was NOT going to appear as a printer under my device list on my computer, but after assembling everything, I initially couldn't get it to respond at all.
I found this Medium post from someone who bought what I think is the exact model that I have. I really appreciate his breakdown on the plotting mechanism and the details on how he re-built the software system, but before embarking on the journey I tried a few things and in the end didn't have the same experience: I did not need to recompile or reinstall any control software. My plotter worked as-shipped.
However:
- The Arduino UNO clone uses a different USB/Serial chip than the standard UNO. On OSX 11.2 (Big Sur) this worked out of the box. On Windows 10, this showed up as "USB2.0-Serial" with a broken driver on the device list. Some googling lead me to this driver page, and once installed the Arduino worked.
- The Arduino is running GRBL. You don't need to know anything about this other than the name (which you will select using UGS, see below). To your computer, you will simply see the Arduino as a generic serial device. In order to plot something, you need software that can send GCODE over a serial device. You should download and install UGS (Universal Gcode Sender). Select your Arduino settings at the top, click "connect" and.. that's it. Once I got the driver installed, the software connected immediately and without issue.
- I found that the JOG options, which I thought would let me manipulate the XY just to test things, didn't really work. The motors twitched, but barely moved. This is almost certainly a scaling setting somewhere, but I mention it because I initially thought I had broken something or over-tightened the belt. Loading a test file and hitting "play" worked a lot better.
- You will ultimately need your drawings to be in GCODE format. This means you will do your drawing in whatever tool you like, then export the vector paths to GCODE, probably using an export plugin. There are quite a few ways to do this, but Inkscape seems to be the best free option.
How does it look?
I have only used the testing files that I got from the seller, but I went and tested every pen in the house. My favorites so far are gel-rollers, MUJI ballpoints (both pretty smooth) and Edding paint pens and sharpies (nicely mushy.) I'm particularly fond of metallic ink on dark paper. I can't wait to start plotting my own stuff!


Software Downloads
Windows 10
- Drivers for serial chip on Chinese Arduino
- UGS (for communicating with the plotter)
- Inkscape (use to convert vector to GCODE: Extentions/Gcodetools/Path to...)
- JTechPhotonics Laser Tool Plugin (This will export the GCODE that the plotter expects. The Gcodetools that ship with Inkscape don't give the right output)
Mac
- Drivers for serial chip on Chinese Arduino
(DO NOT install if you are running OSX 10.14 Mojave or later) - UGS (for communicating with the plotter)
- Inkscape (use to convert vector to GCODE: Extentions/Gcodetools/Path to...)
- JTechPhotonics Laser Tool Plugin (This will export the GCODE that the plotter expects. The Gcodetools that ship with Inkscape don't give the right output)