Jailbreaking IoT Plugs: Part I
During the pandemic I got interested in the idea of home automation - at least automating my lights. Not suprisingly, this is a popular hobby and there are tons of options. I ended up with a pretty straightforward set of requirements: I wanted the ability to turn lamps and devices on and off via computer, smartphone and scripts.
There are many super fancy things that are possible here: remote and offsite control, synchronization with time and events, presence detection through phone and other devices. These are neat but beyond what I actually wanted.
For control I am using HomeAssistant, with a Fire Tablet mounted to the wall and running Fully Kiosk for guest and child use.
If I could Start Over
For the switchable plugs, I currently recommend the IKEA TRÅDFRI zigbee-based modules, they're inexpensive (around $9 a plug), totally open and do not require WiFi (instead they make a cool mesh network). In my case however, these cost twice as much in Switzerland (!) and were not available when I started this project, so let's go with the Tuya modules.
You will need another Wifi Router
If you are planning on using wifi modules, you will want a dedicated router. I initially did this for security purposes (even after jailbreaking the Tuyas, I didn't want to run a dozen mysterious internet connected devices on my network alongside the rest of my household data), but I also was quickly reminded of the limitation of home routers.
While commercial and modern routers can handle dozens or even hundreds of devices, many older and cheaper routers max out at 10 devices. Be aware you won't get much clear feedback when this happens, the devices will just not work. It's helpful to give all your IoT devices their own hardware and network space.
Various Paths to Tuya Liberation
I opted for these Tuya modules which are (similar to the IKEA modules) about $9 a unit, available in all plug configurations. Tuya is a general-purpose IoT company that sells their tech to a huge number of manufacturers and there are many, many, many such devices on the market. While Tuya modules are widely available and inexpensive, they are all designed to phone-home to Tuya cloud. It may be true that Tuya cloud is completely secure and inncotuous, but this is still totally unnecessary - there is absolutely no reason whatsoever that turning on a light bulb should require an internet connection, let alone an entire cloud service infrastructure.
OTA Flash?
I had initially selected the Tuya models because they were ESP8266 based and in the past it was possible to OTA (Over-The-Air) flash them courtesy of the TuyaConvert project. Newer hardware (including the ones I bought) can't be used in this way. It is possible (and there are many tutorials) that consist of swapping out the microcontroller board entirely, using only the case, relay and power regulation hardware from the original plug. This seemed preferable to throwing the plugs in the trash, but wouldn't it be cool if you could just flash the processor?
TuyaLocal
One option is TuyaLocal. While I was able to get this to work (and with all credit to an active team of hacker hobbyists), it's completely unreliable. In my case, over the last two years or so, I've rarely been able to keep a basic desk lamp online and accessible for more than a week. It's so frustrating I essentially gave up and unplugged everything.
Liberating the Beken-Based Tuya Modules
Thanks to some awesome Polish hackers, it's actually now possible... the newer plugs (the one I use) are based on Beken processors.
- We will be installing this software on the device
- You will need a USB TTL adapter to use as a programming interface. You can probably also make do with your own circuitry or an arduino.
- There is a GUI for programming the Beken modules called BekenWriter. I had trouble finding the source, but am linking to the binary I used. You can also use this open-source tool. In my case, I had to use both!
This process is an adventure
There are many tutorials online for some of the hundreds of different devices you can unlock this way. There are no generic instructions without "well it depends" at some point. In the end I found it was relatively straightforward to set up an assembly line (I liberated 15 modules in about 8 hours total and could probably go faster if pushed), but it wasn't always obvious how to proceed. I'd recommend having a bit of electronics and programming experience first, and a LOT of patience, if for no other reason than it's helpful to understand what kind of failure you're seeing. Much of this is trail-and-error and failure troubleshooting. That said, I will do my best to write the rest of this as generically as possible.
*** IMPORTANT***
NONE OF THE FOLLOWING STEPS SHOULD EVER BE CONDUCTED WITH THE DEVICES ATTACHED TO MAINS POWER. THIS IS NEVER NECESSARY AND IS ALWAYS DANGEROUS. UNPLUG. EVERYTHING. ALWAYS. DO NOT PLUG THE DEVICES BACK IN UNTIL THEY HAVE BEEN FULLY RE-ASSEMBLED.
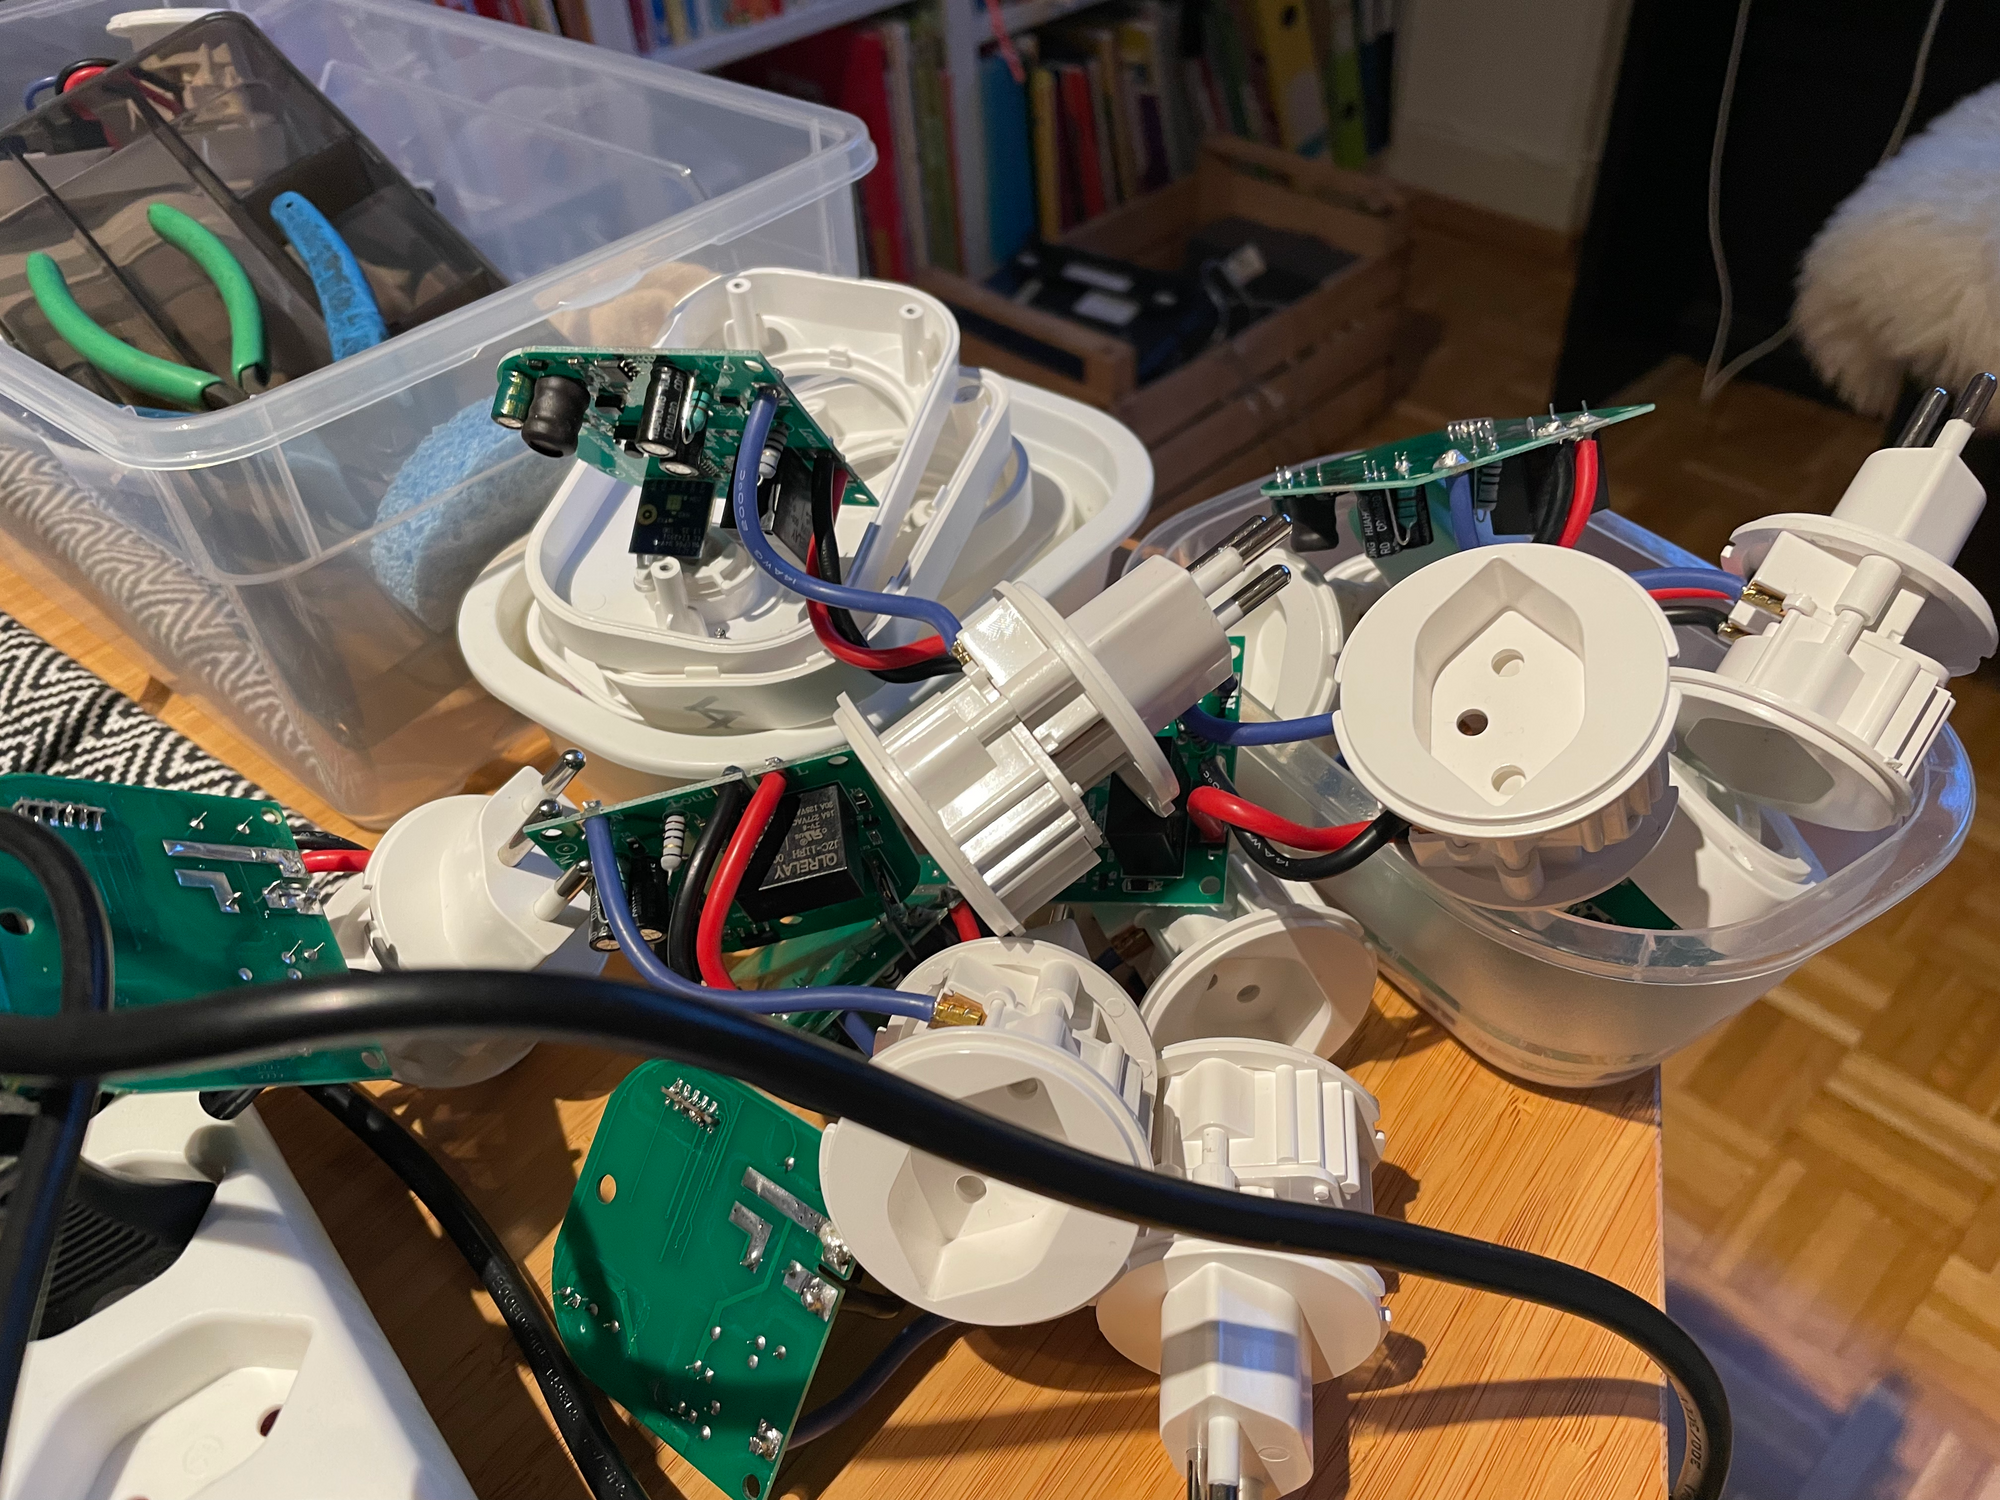
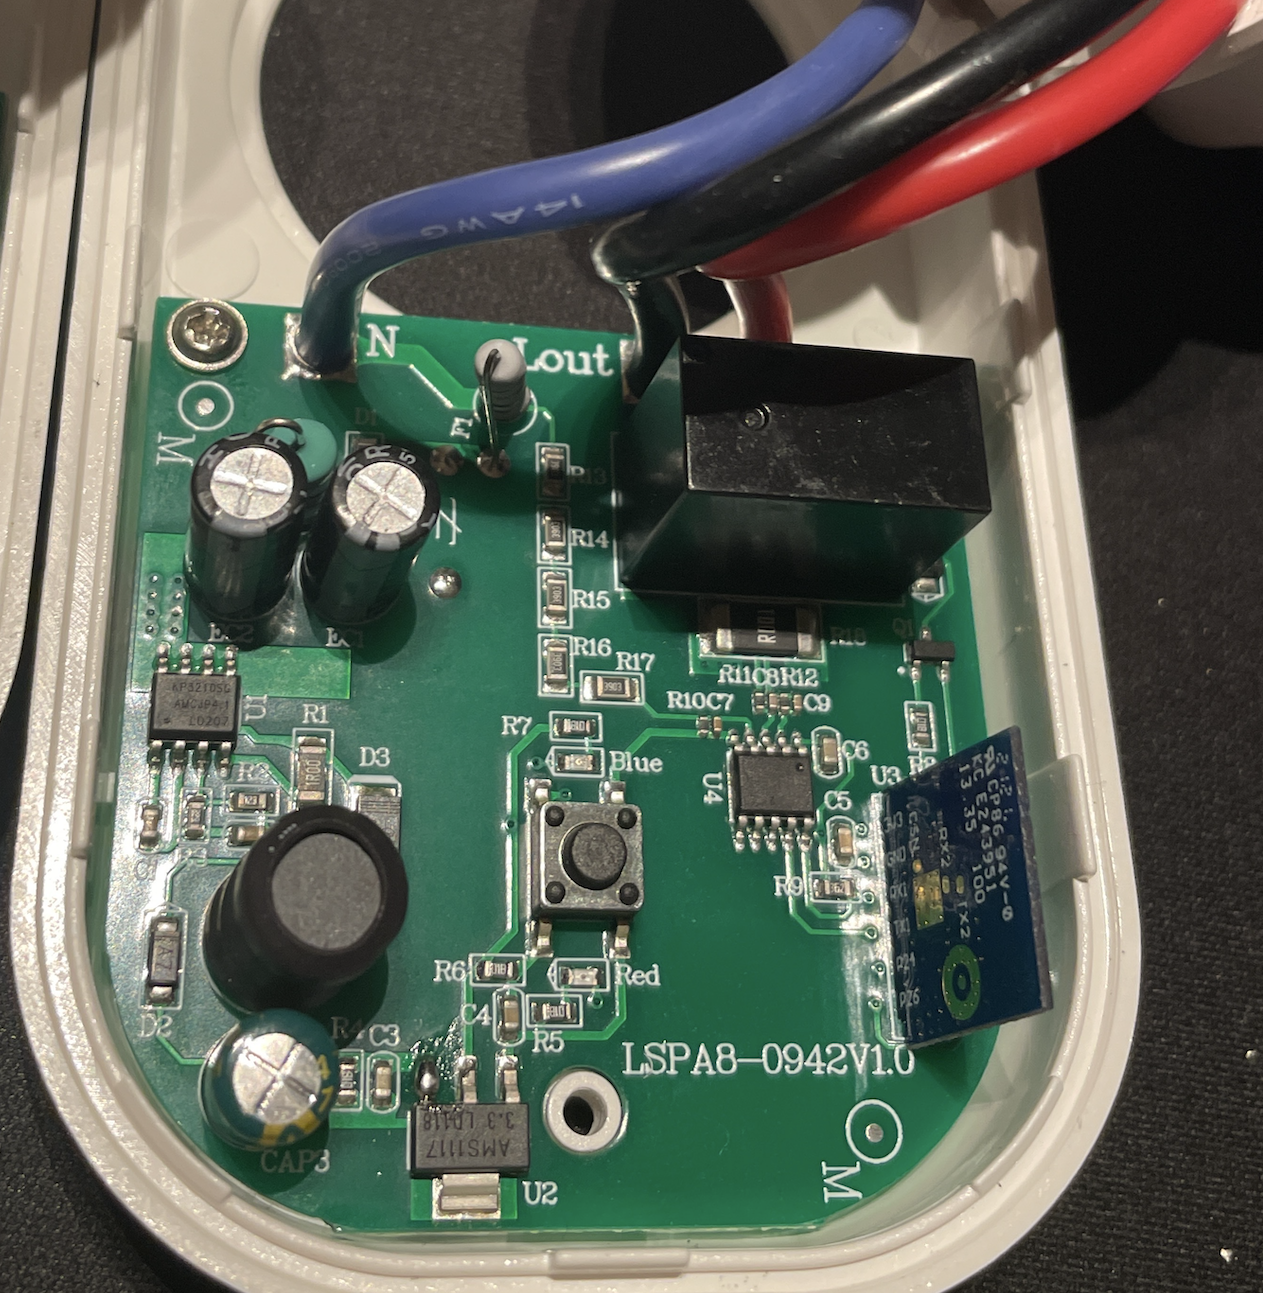
- Crack open your hardware and locate the microntroller.
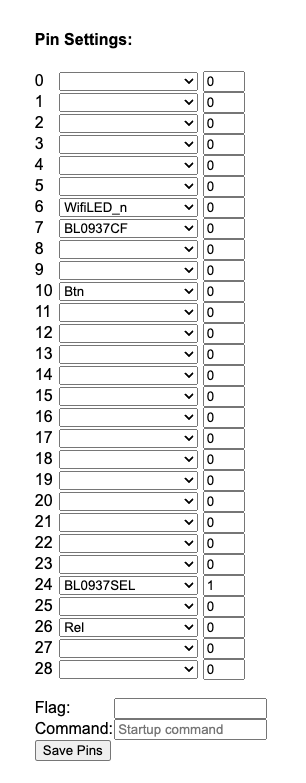
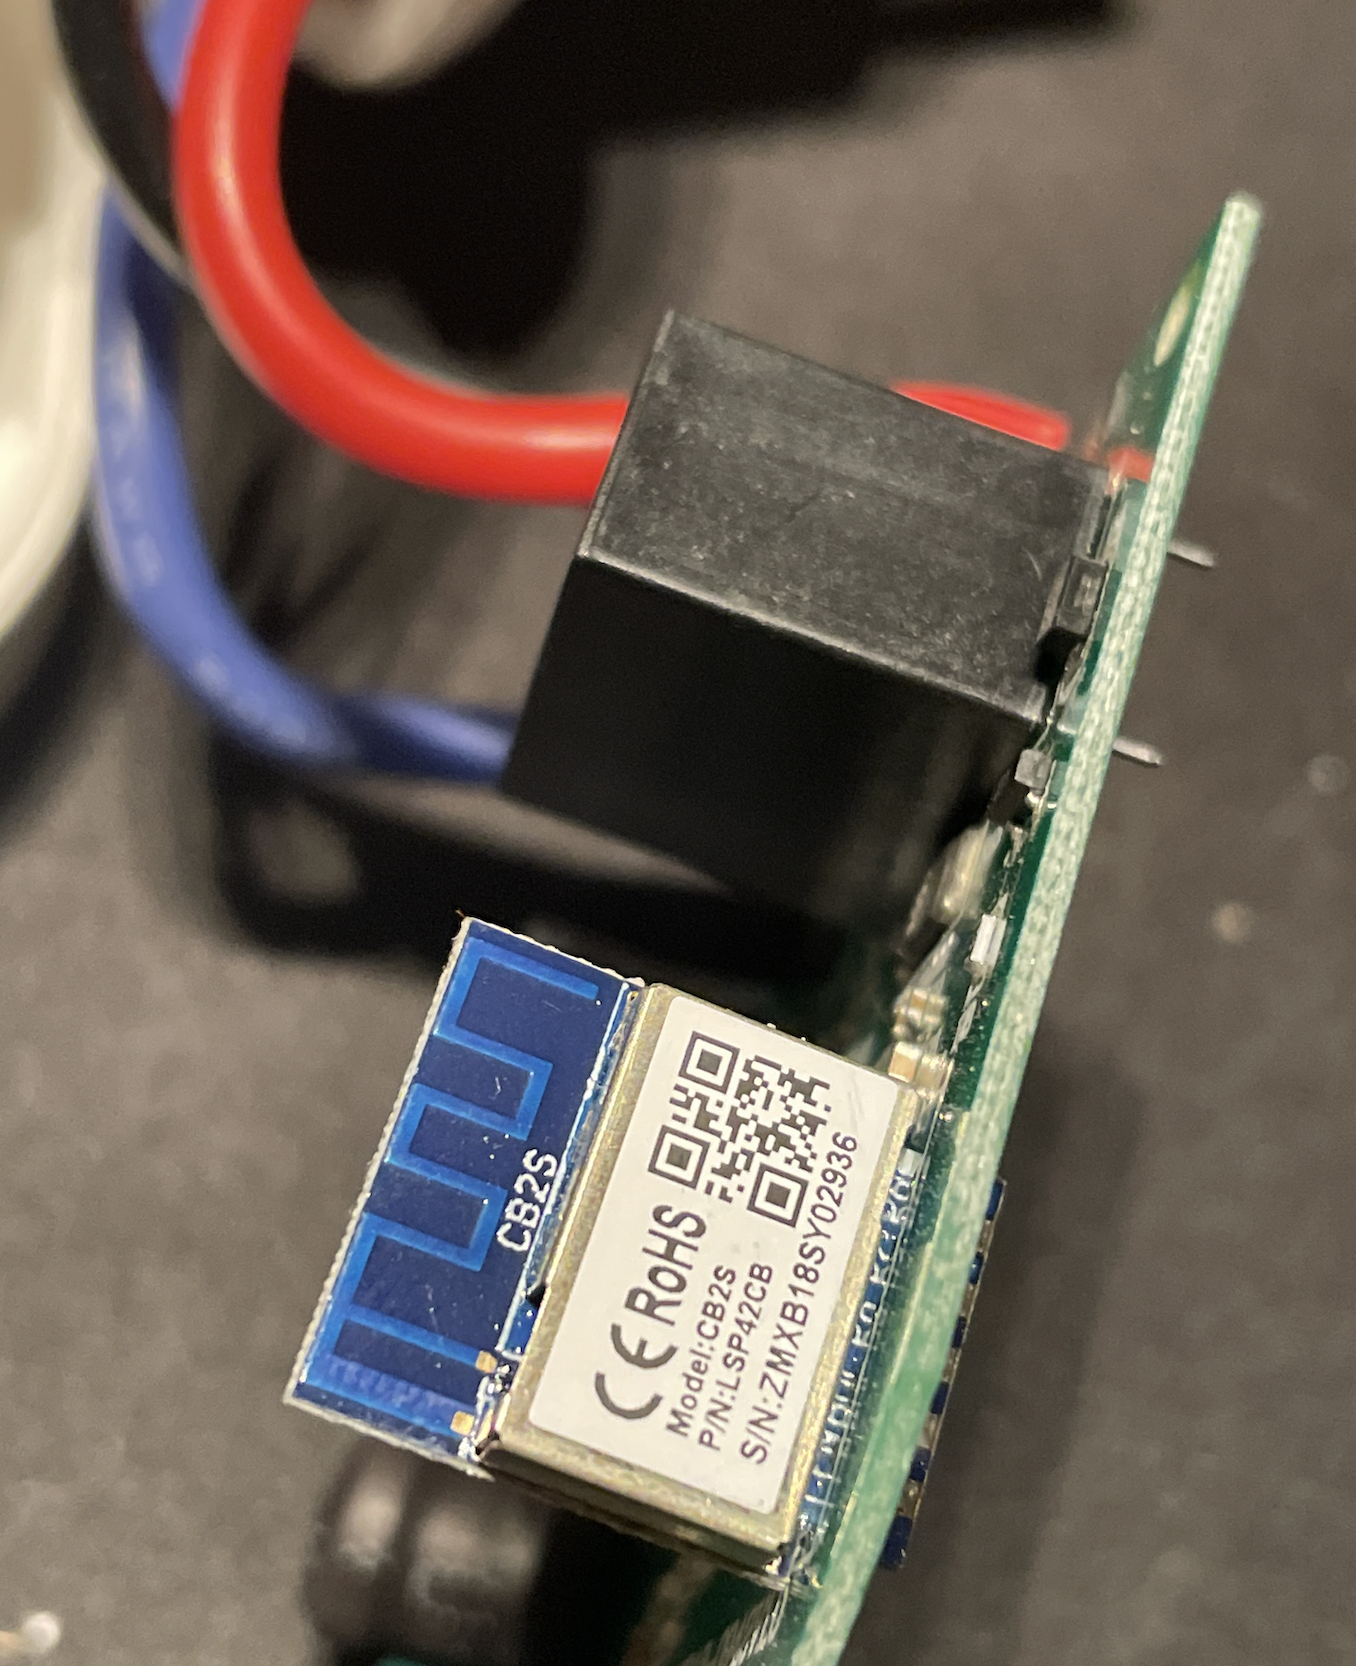
Fortunately, most of the devices I've been working with are manufactured modularly and held together with screws. You might encounter press-fit, plastic-weld and glue, which is a pain in the ass, but if you're lucky, you can just unscrew the housing. In my experience, the microcontrollers vary quite a bit, but always have the same pinout, have been blue, and are mounted perpendicular to the main board. Many of these characteristics may be different on your device, but look for something that appears somewhat like the following module. If the board does not have a shield over the chip, you should be able to read it (I needed to use a macro photo, way too small for my eyes), and hopefully it reads "BEKEN / BK 7231T" There is also an N variation (Mine were), which is "BK7231N". Both are possible to flash and both have the same pinout. Verify the pinout:
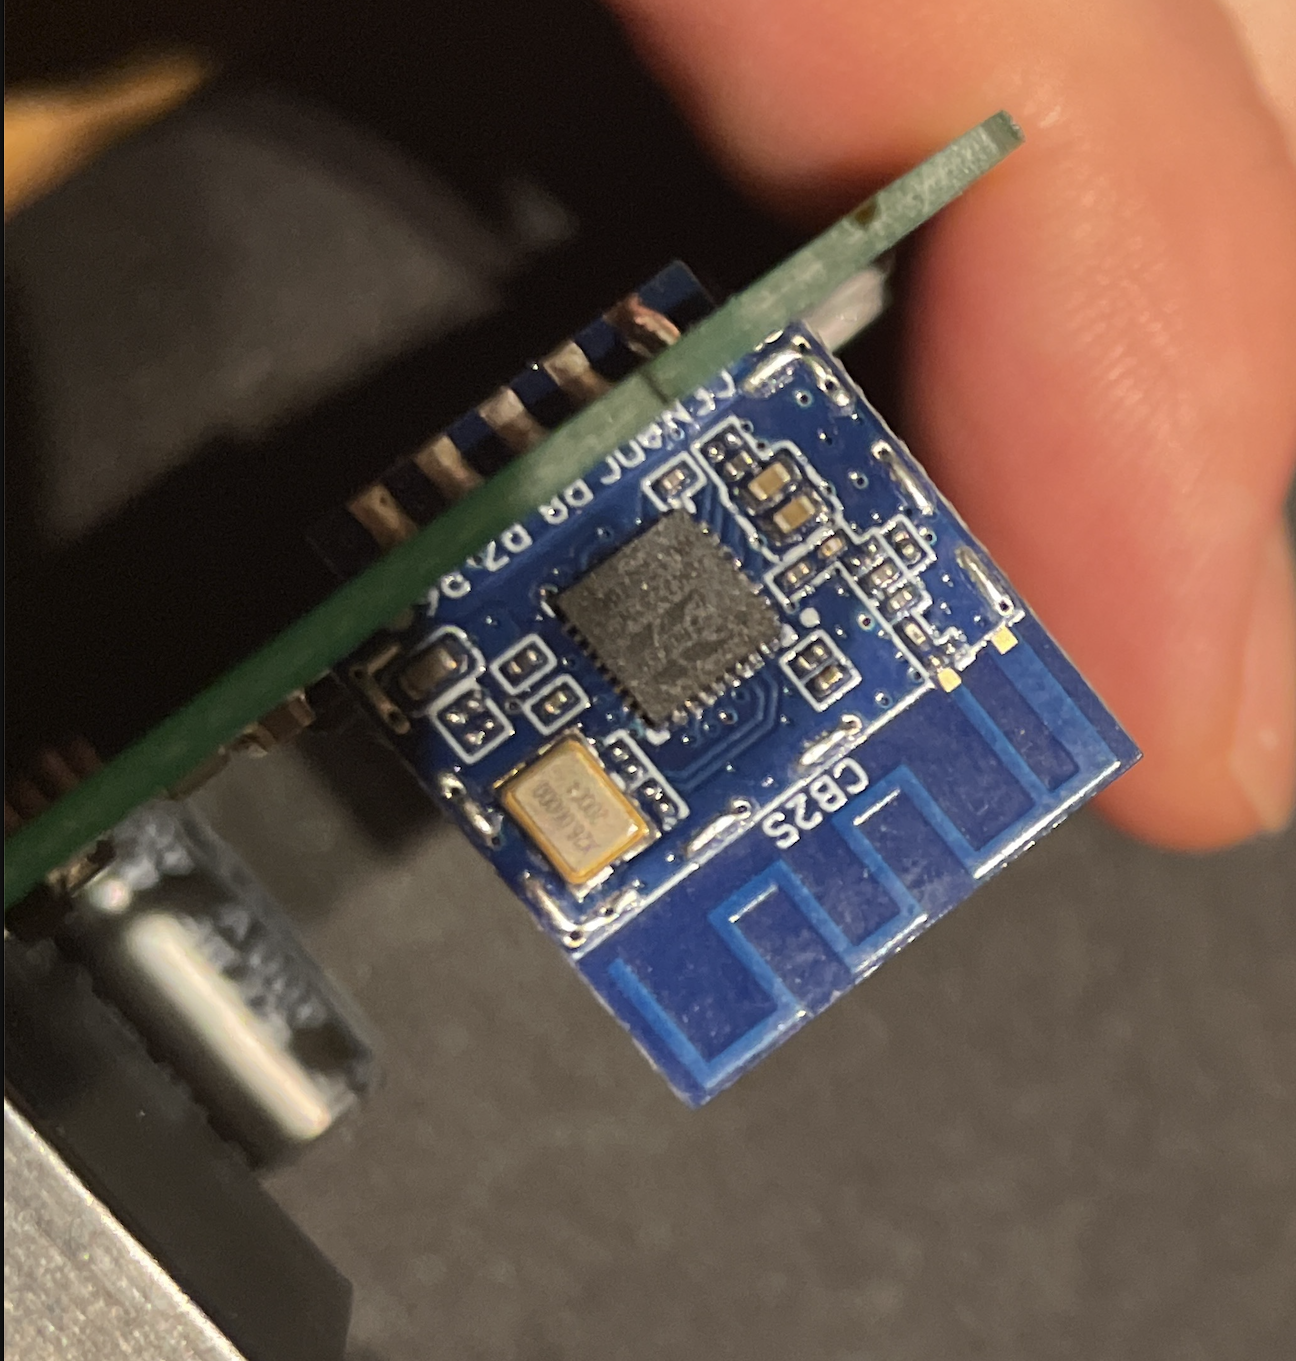
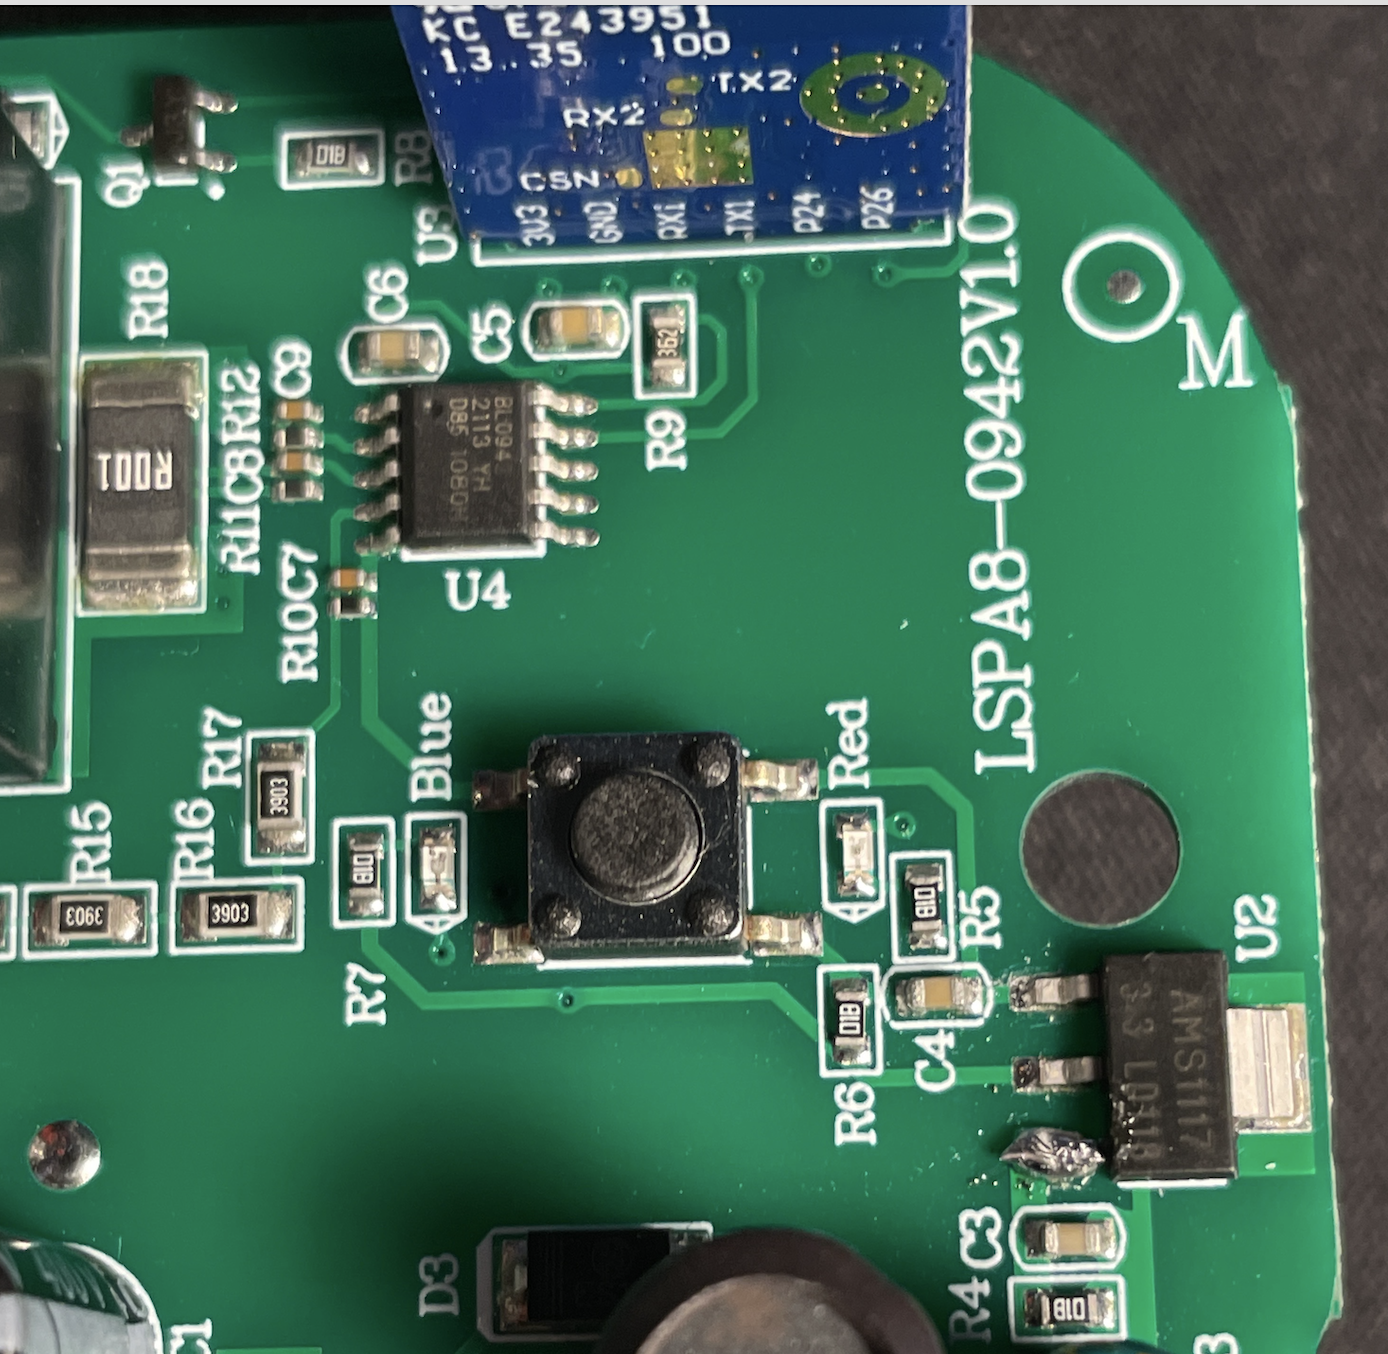
Flipping the board over, the pinout is as follows:
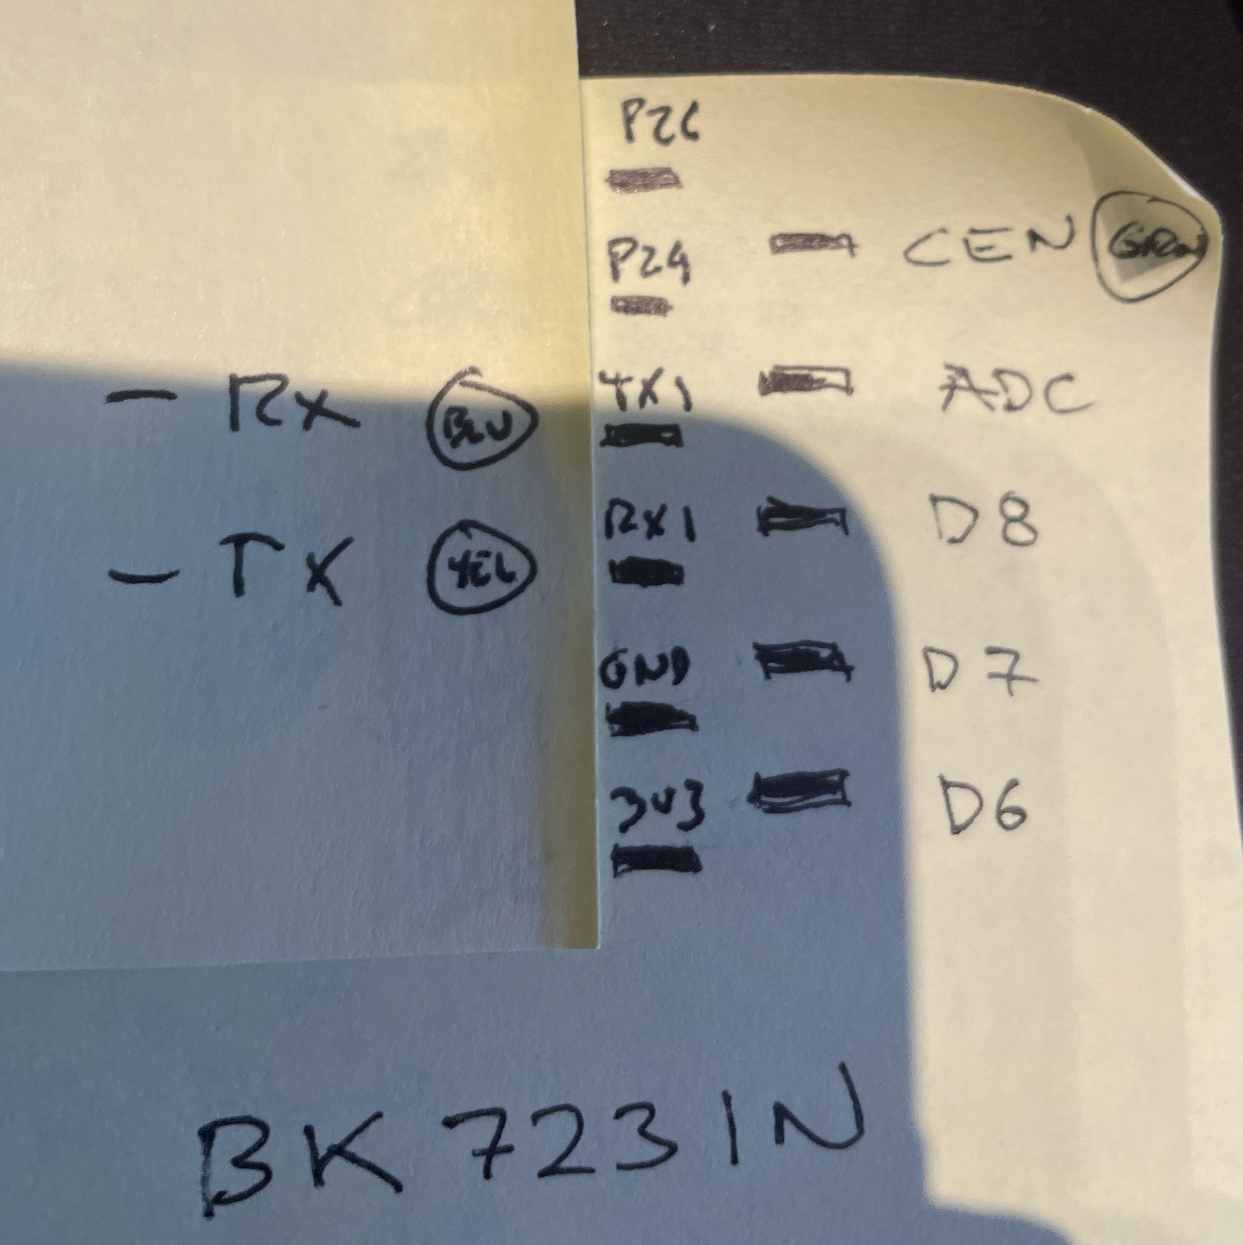
You care about CEN (Reset), RX1 and TX1. You do not care about the rest of the pins.
2. Prepare the computer for programming and the in-circuit controller for flashing
Programming Software
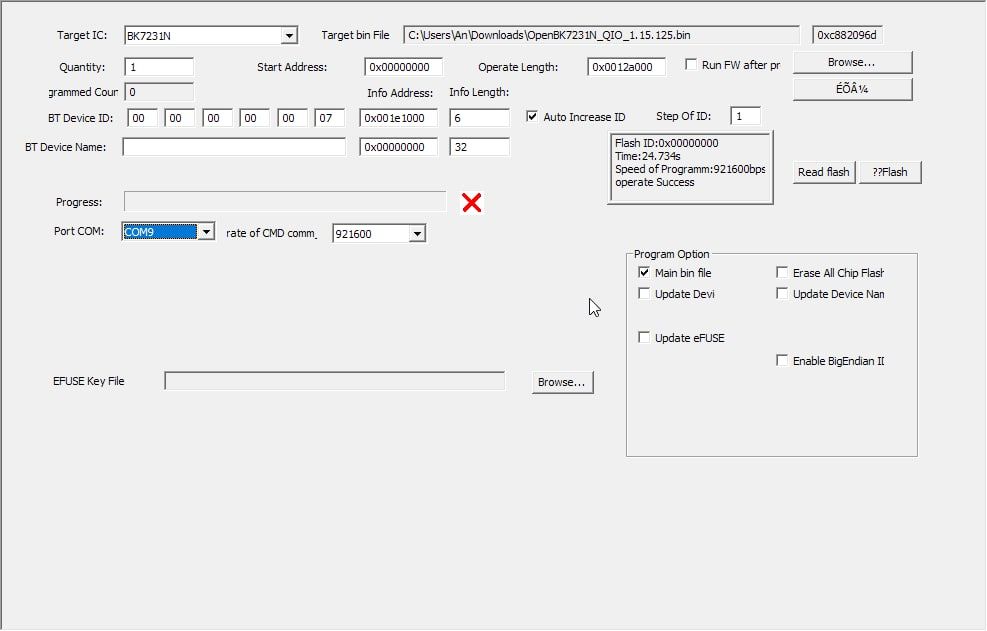
You will need a windows or unix machine running either a copy of BKWriter or the Python scripts available here. And you will need a copy of the firmware we are flashing.
In my experience, I needed both the scripts and the GUI! There seems to be a great deal of variation in how these plugs are manufactured, although I bought all of mine from the same lot, some I was able to program some with BKWriter, some with the Python script, some responded to both, some required one then the other. Some seemed to be flash locked and some weren't. I wish there was a better system here, but I just kept both apps up and alternated until I found a combo that worked reliably for that particular device.
If you (like me) are not used to using windows, I recommend using PowerShell in admin mode. You also need to manually configure PS to allow you to run scripts.
This worked for me:
Set-Executionpolicy: bypass

python -m venv env

.\env\Scripts\Activate.ps1

python uartprogram PATH_TO_FIRMWARE --unprotect -d COM_PORT -w --startaddr 0x0
For BK Writer, I found it worked better if I bumped down the baud rate to 921600. If the write fails with flash locked, try the python script method instead:
Programming Hardware
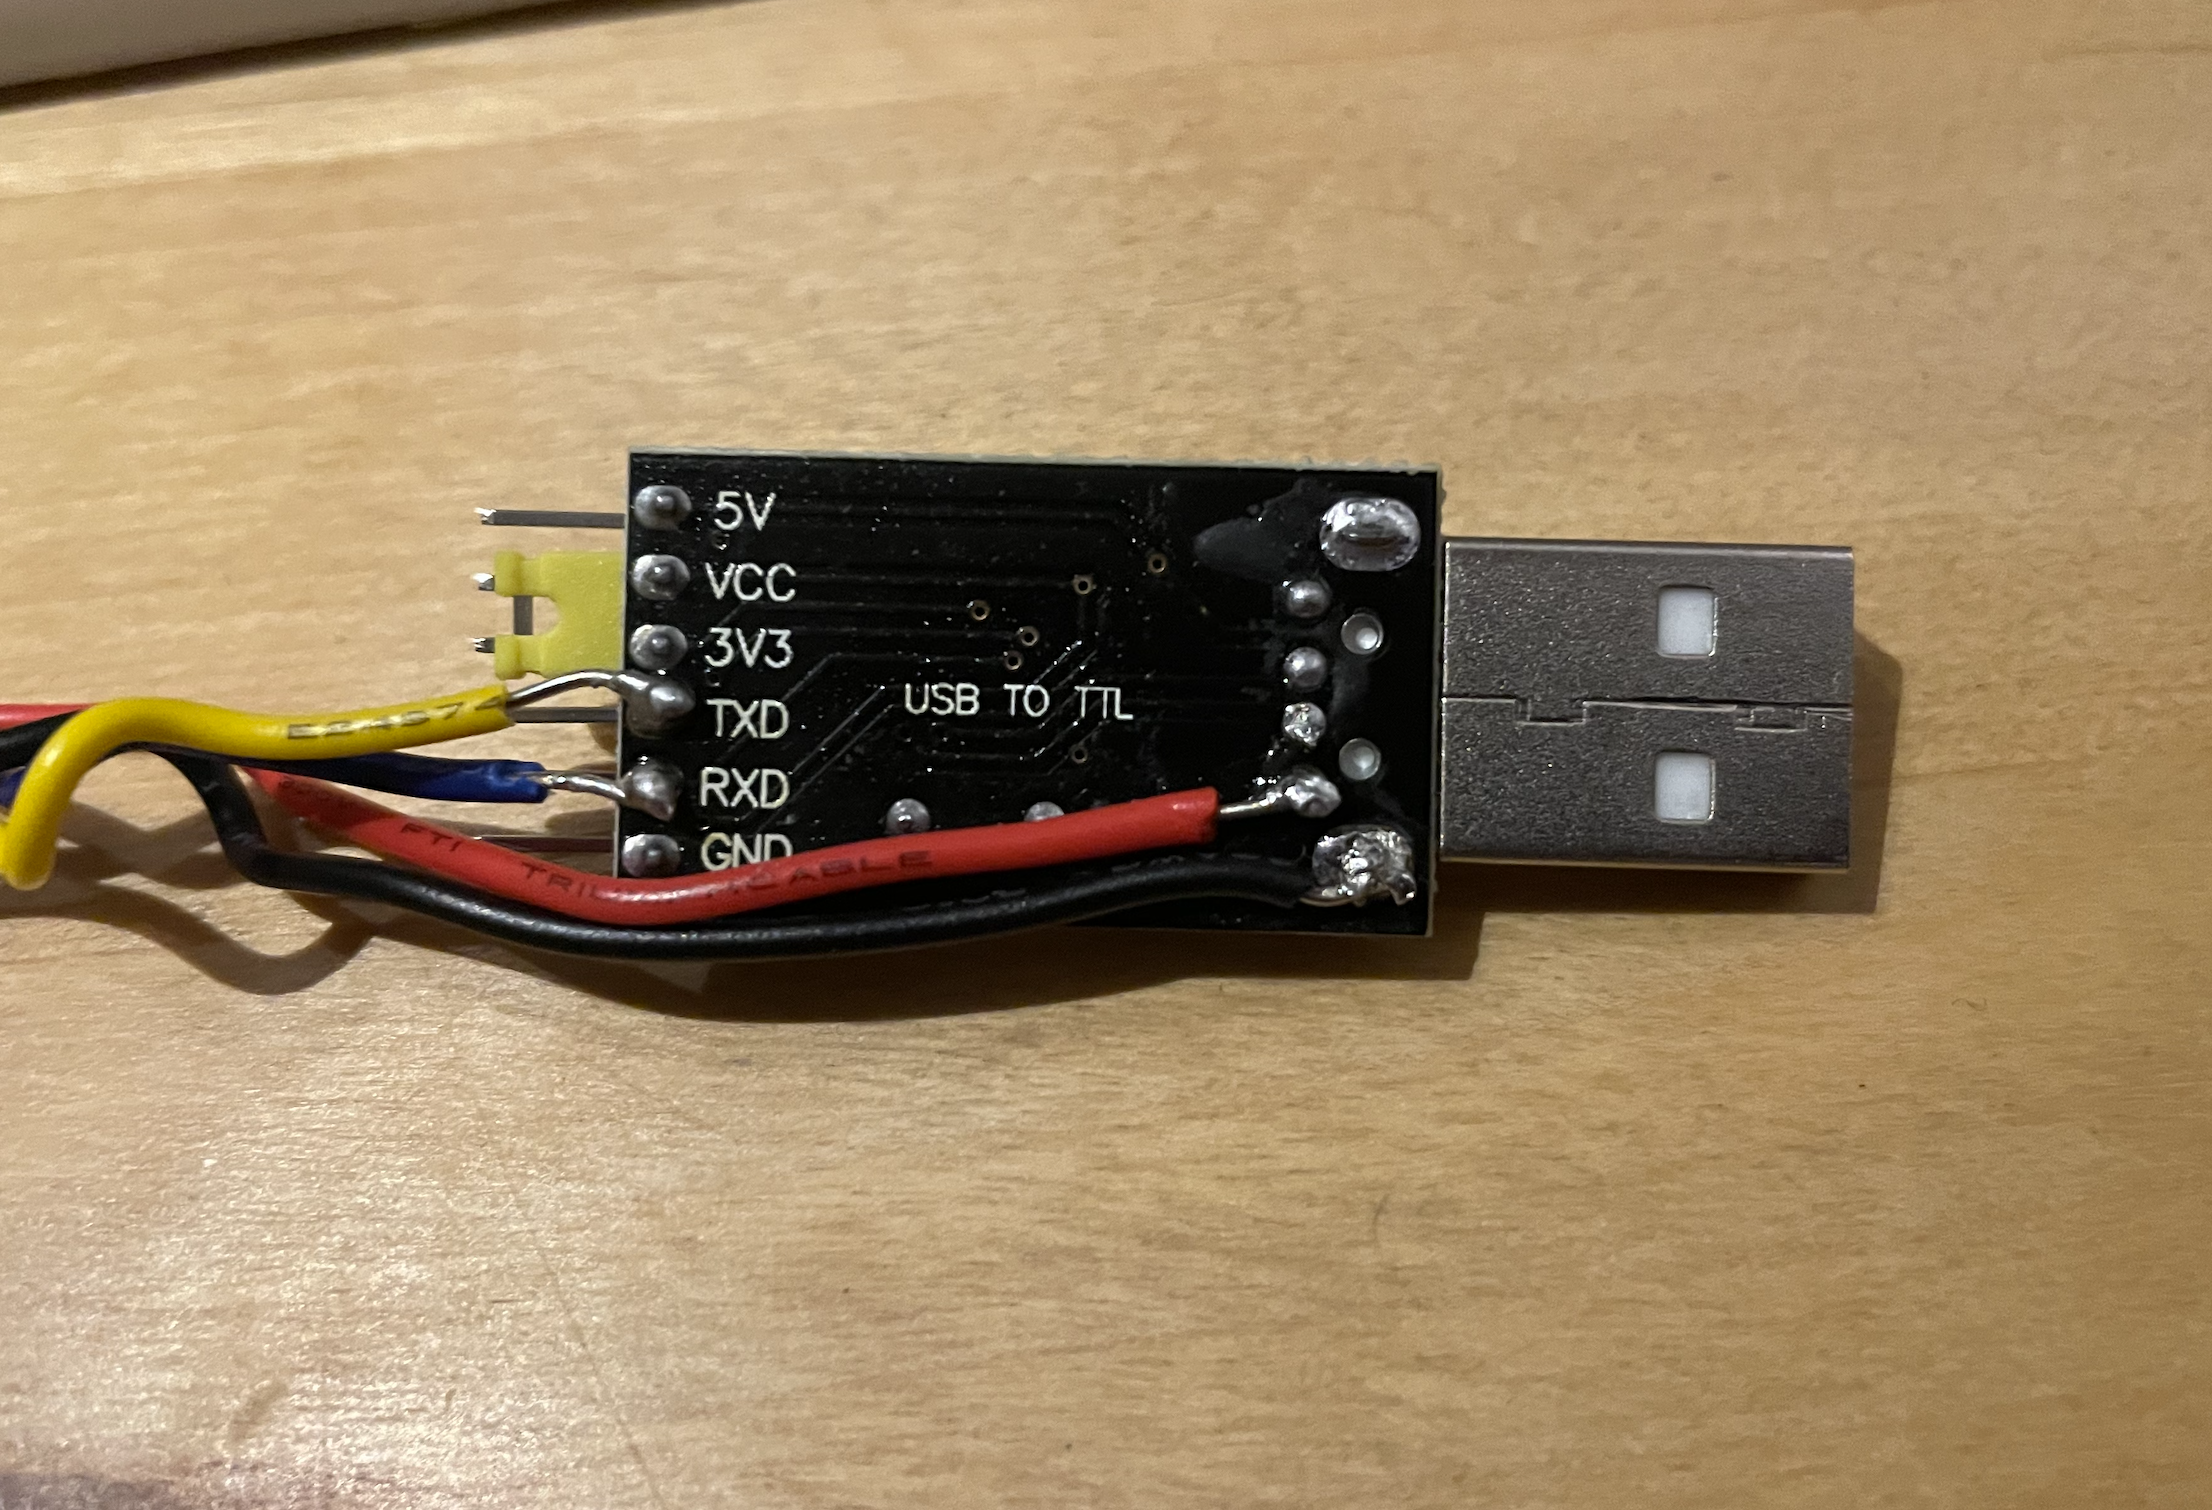
You will want one of these USB TTL conveters which will allow your computer to talk to the Beken microcontroller. In addition, we are going to need to power the Beken circuit WITHOUT CONNECTING THE PLUG TO THE MAINS. We can do this using the power and ground from the USB connection. It is advisable NOT to use the 5v and GND pins from the programmer, but instead to tap directly into the computer side as shown:
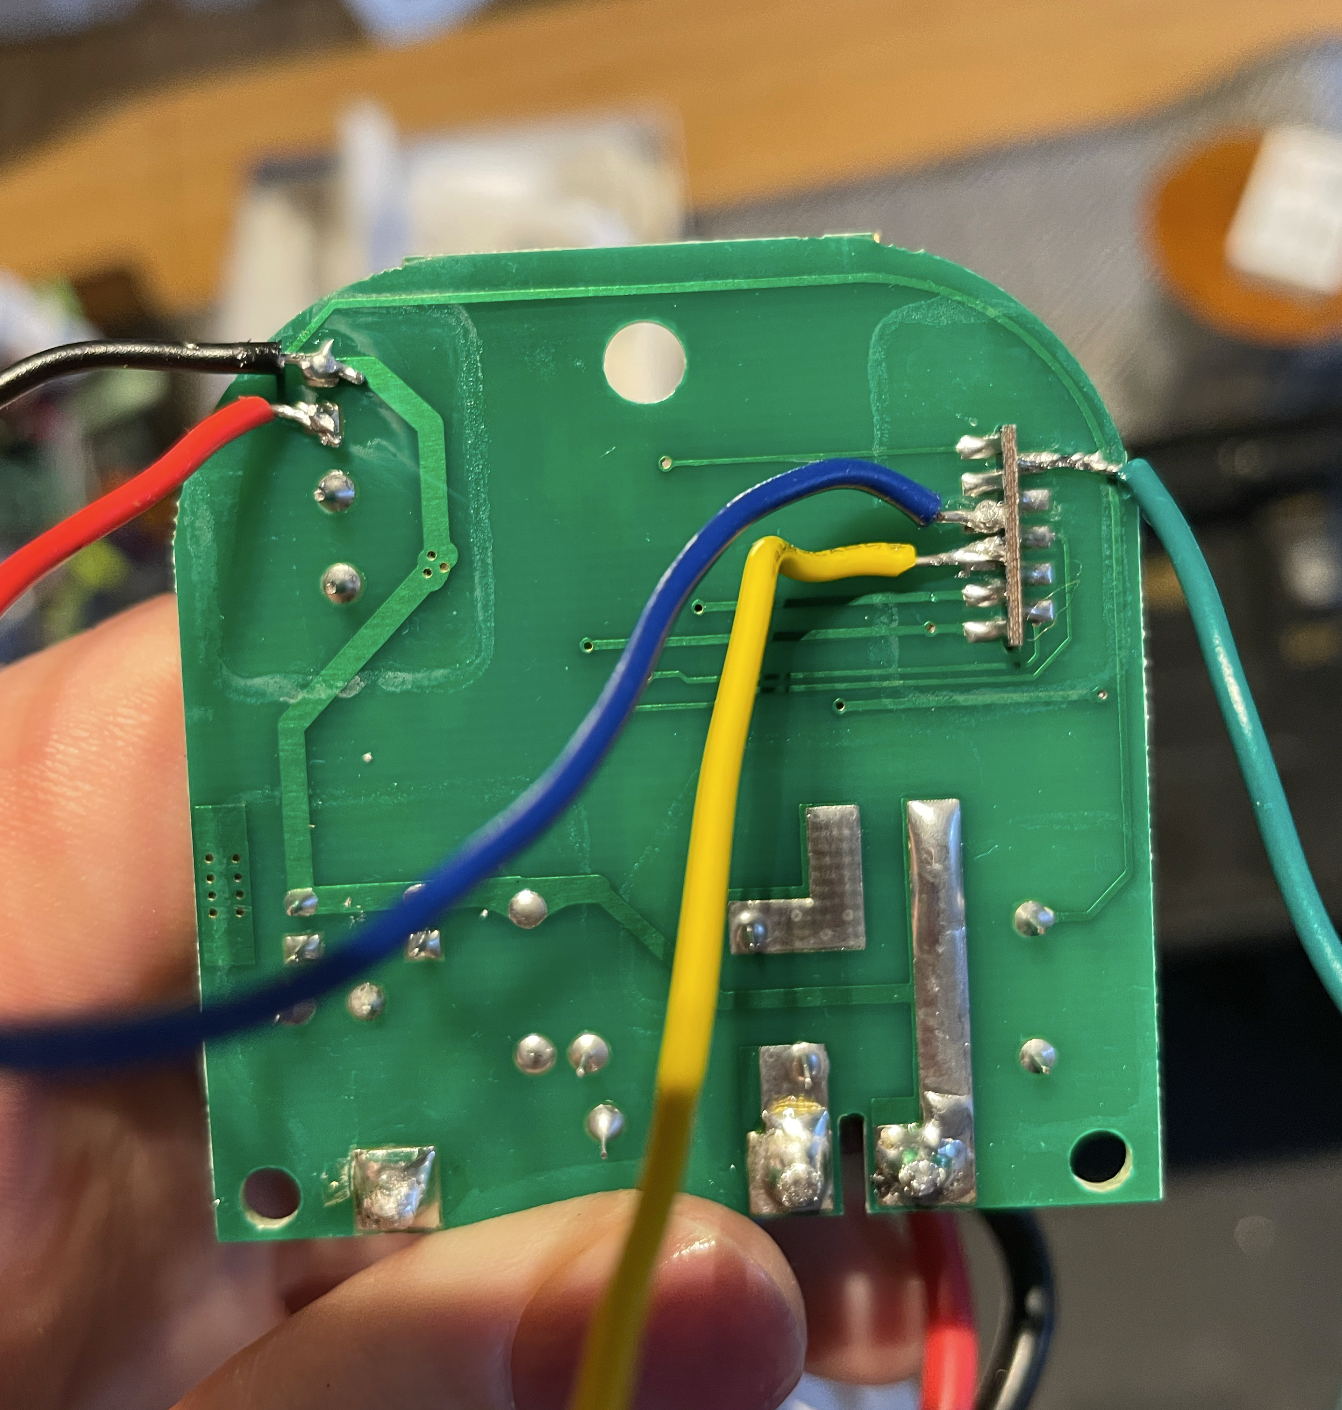
On the plug side, many tutorial suggested attaching the 5V to the input of the voltage regulator, which should look like this:
This works fine, but I managed to destroy two of my plugs this way. I suspect that my soldering iron was up to high and/or I potentially fried some of the SMC parts next to the microcontroller. Using a multimeter I was able to locate two electrically equivalent points on the opposite side of the board (the pins of a big filter cap), and after I switched to those spots instead I had zero failures.
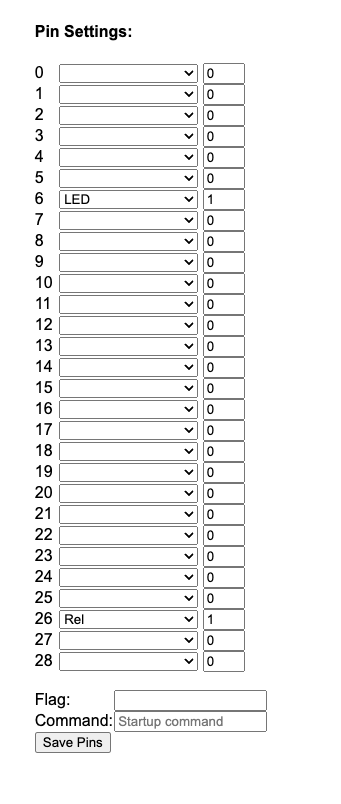
This is what the plug board looks like after I prepared it for flashing:
3. Flash the
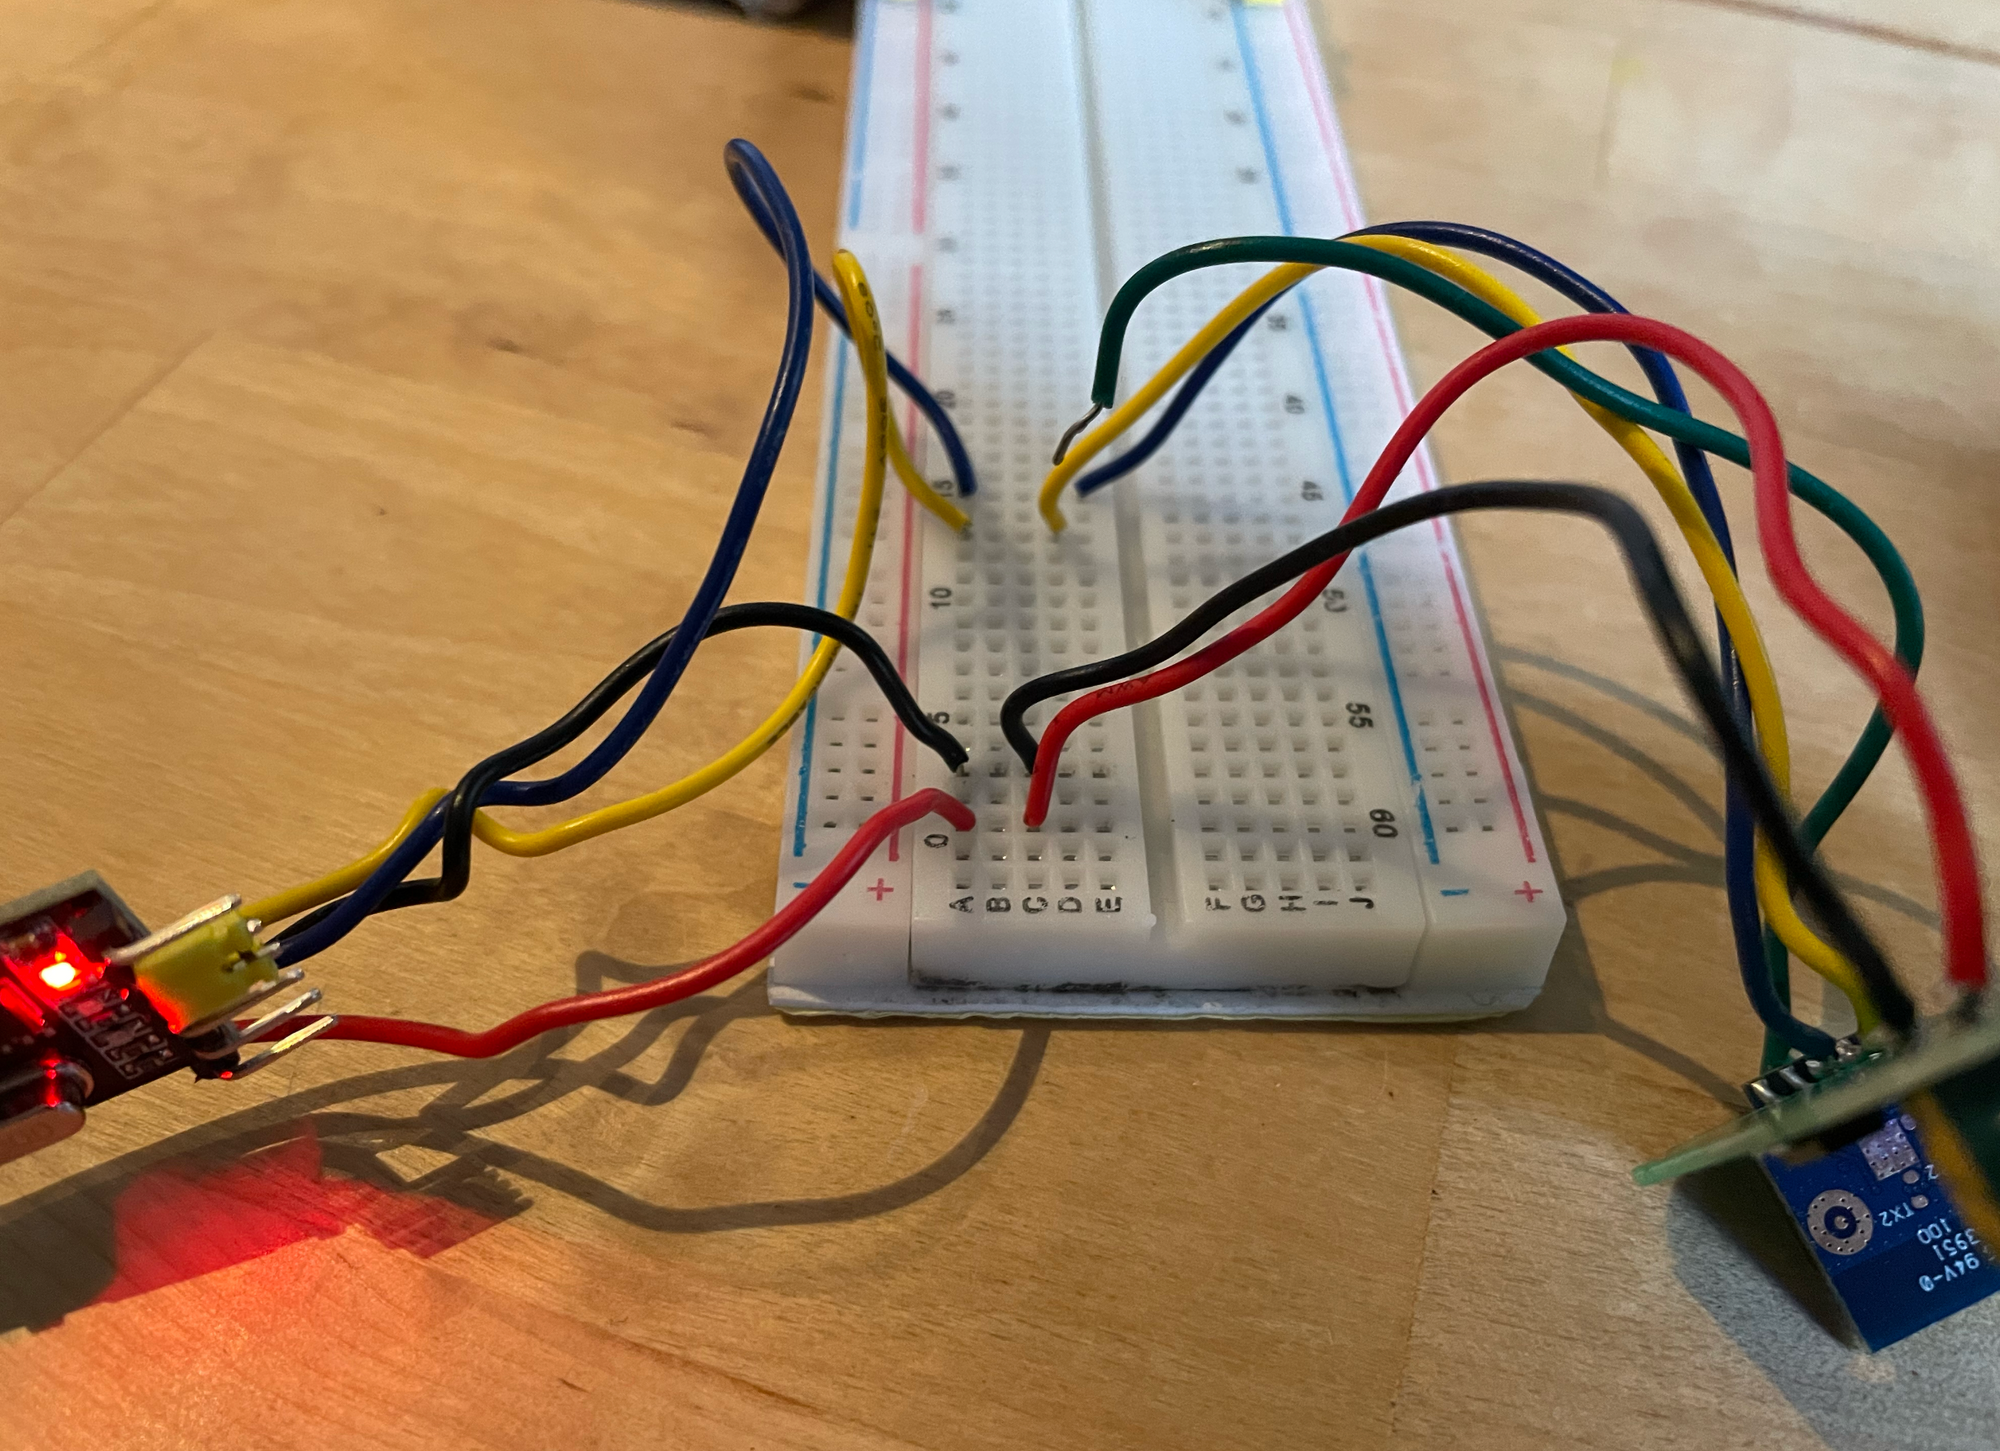
I used a breadboard to connect the TTL converter (left) to the Tuya module (right). If everything is connected properly, the module should be behaving as if it were plugged in BUT IT IS ABSOLUTELY NOT PLUGGED IN TO MAINS.
Running off the 5v from the USB adapter, the module should be blinking and serving an access point using factory firmware. Run PROGRAM on BKWriter and/or run the python programming script. Once you start this process, you will see a 15 second timer start. See the floating green wire in the image above? That's attached to CEN.
Within that 15 seconds, you need to grab the CEN line and touch it to ground. If there are any lights on the module, you will see them go out. Hold the CEN line in place for about a second and then remove it from gound. After release, you will see the software immediately change state and the new flash should begin downloading. There are many ways this can fail, but success should be visibly obvious. If it works, congratulations!
4. Verify that everything is working
The easiest way to verify the new software is installed is to look for a SSID named "OpenBK7231N_XXXXXXXX" where XXXXXXX is a unique ID for your new plug. If you connect a device to this access point, you will then be able to configure the plug by accessing http://192.168.4.1/index. Congratulations!!
Part II: Configuring the Liberated Plugs To Actually Do Something